
Deleting emails from your IONOS mailbox
26 September 2022Once your IONOS mailbox is over 85% full you may start to receive notifications that you could stop receiving emails.
To fix this, you need to clear/delete some of the messages from your inbox via the IONOS website.
Follow these easy steps to do that.
Step 1. Login to IONOS Mail
You need to directly login to IONOS Mail to ensure that any deleted emails are removed from the server, not just your device. To do that, click https://mail.ionos.co.uk/ and then enter your email address and password.
Step 2. Identify the emails you want to remove
If you’re very close to a 99% or 100% full email account, then the fastest way to fix the problem and start receiving emails again is to sort your emails by the largest emails (usually they’ll have larger attachments which are what’s clogging up your inbox)
Here’s how to sort by largest files first:
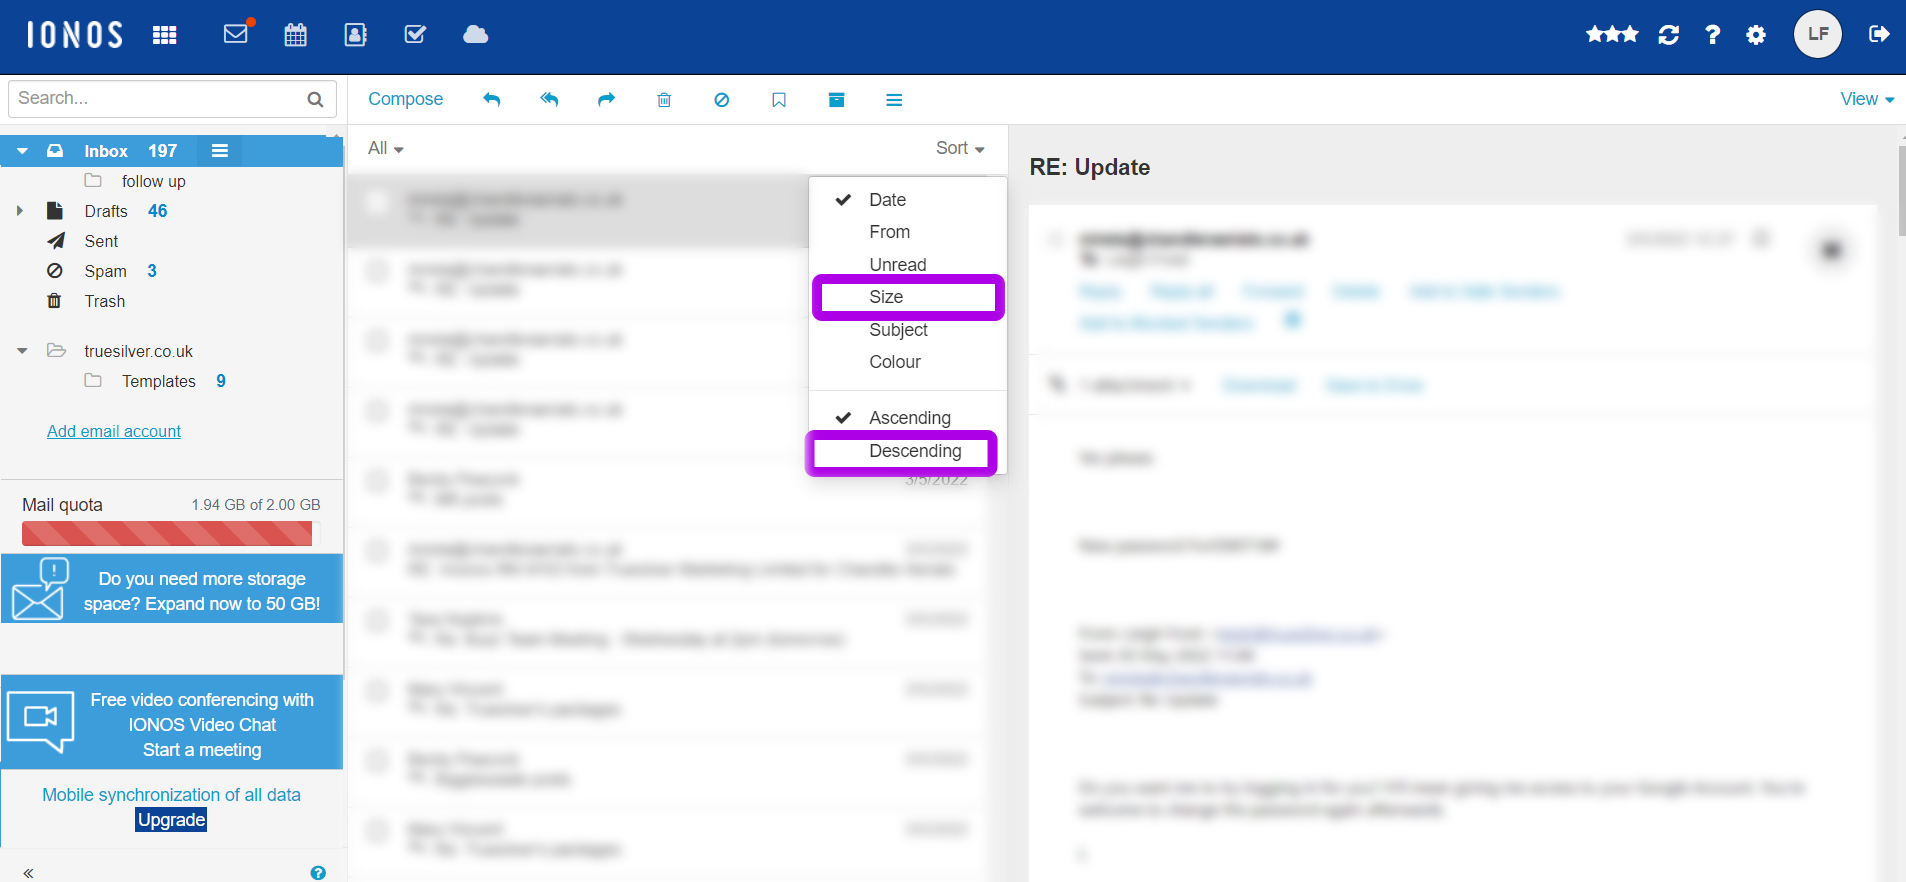
Click Sort > click Size and then click Descending
This will then show your largest emails first.
To show the oldest emails first instead:
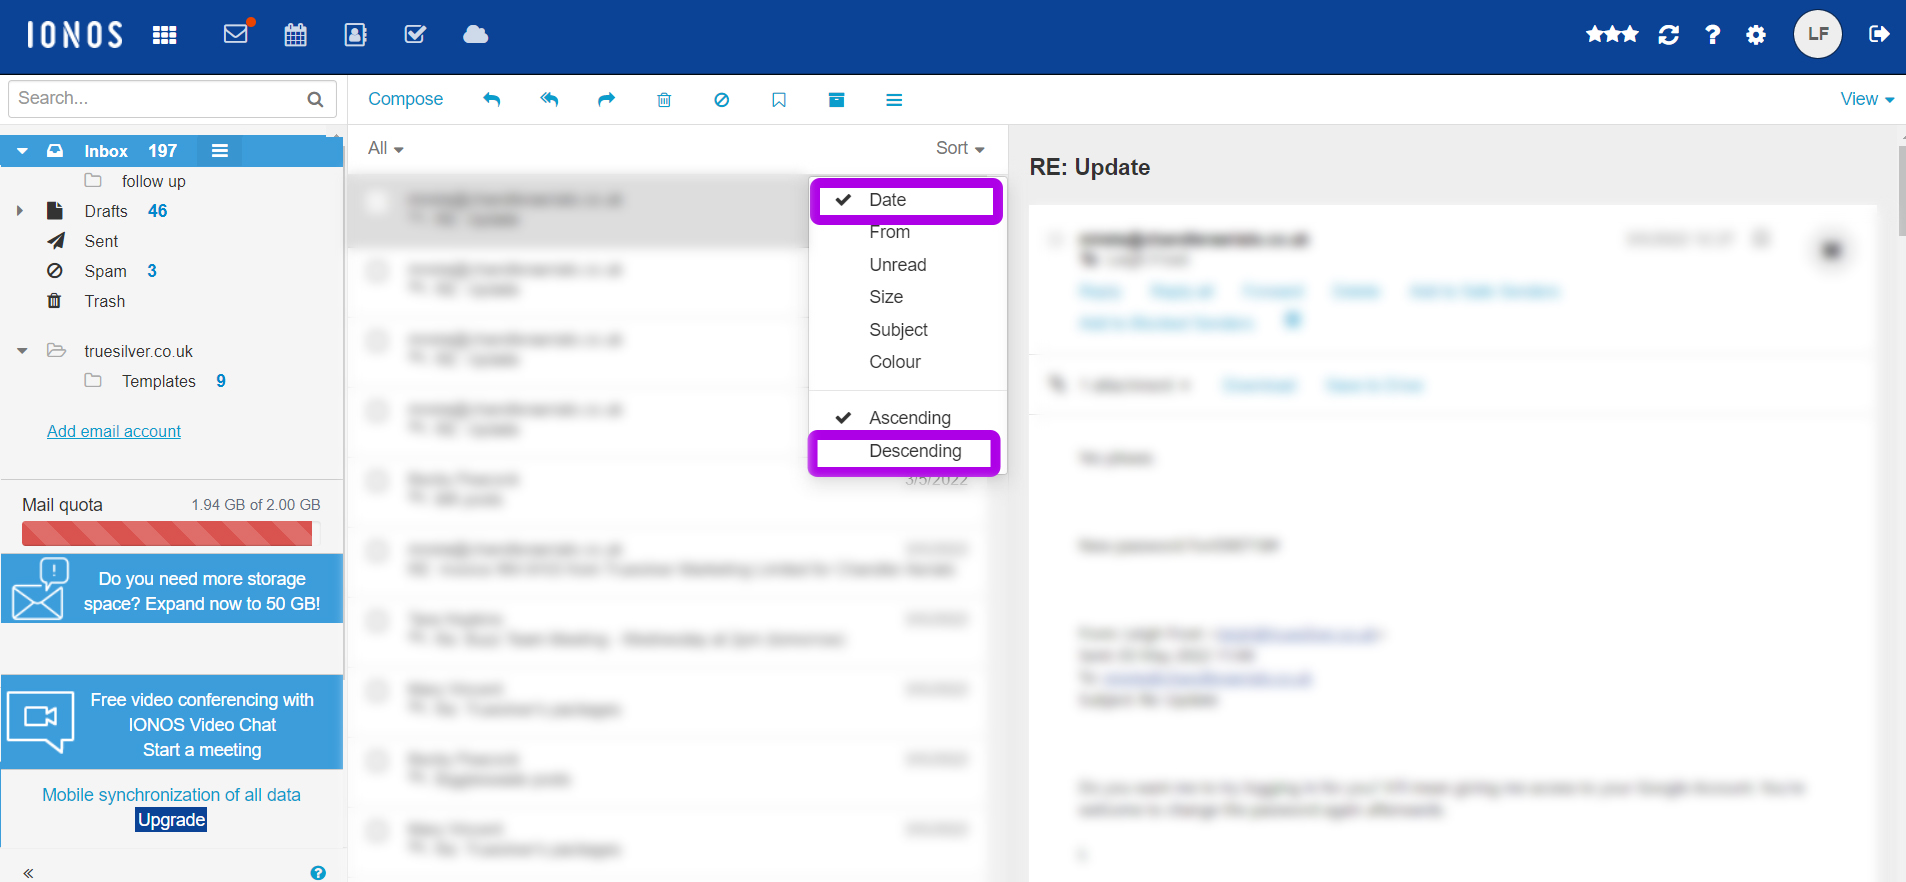
Click Sort > click Date and then click Ascending
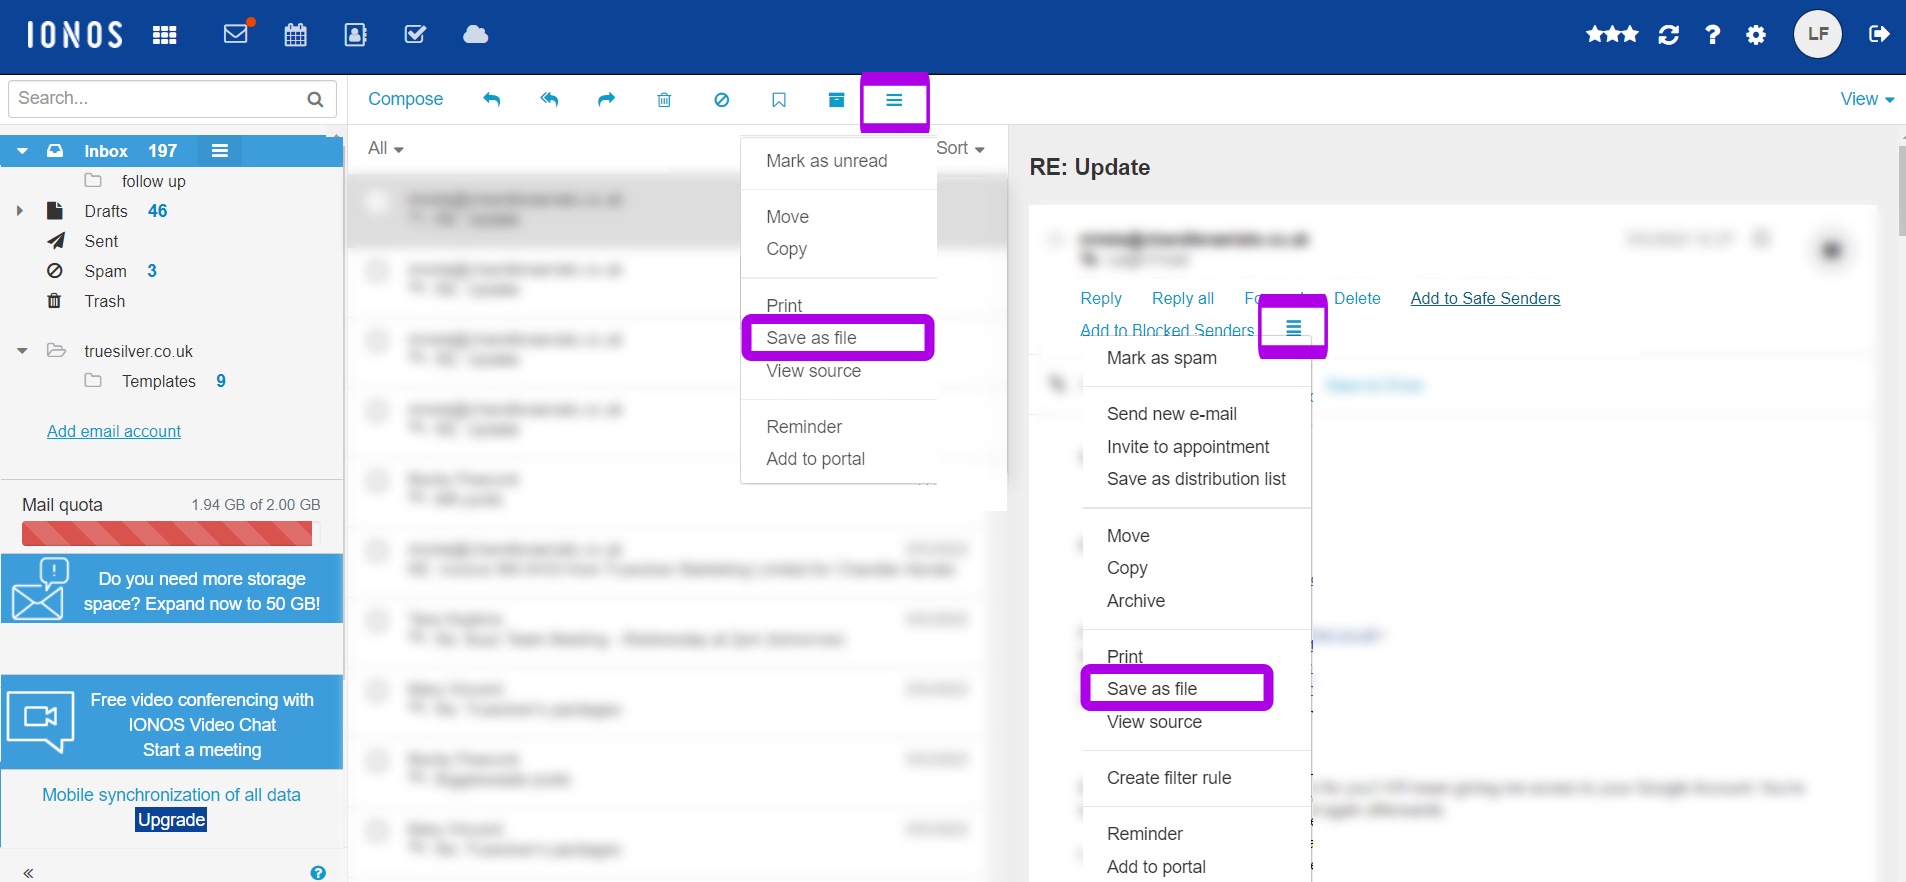
Step 3. Save any emails you want to keep
Obviously there may be important emails that you want to keep long term. These can be downloaded as files and then opened with any Mail software such as Outlook, Microsoft Mail, Thunderbird or Mail for iMac.
To save the emails you can either save them individually clicking on the email and then the three lines icon also known as the burger/menu symbol. Then select Save as file and save to your hard drive.
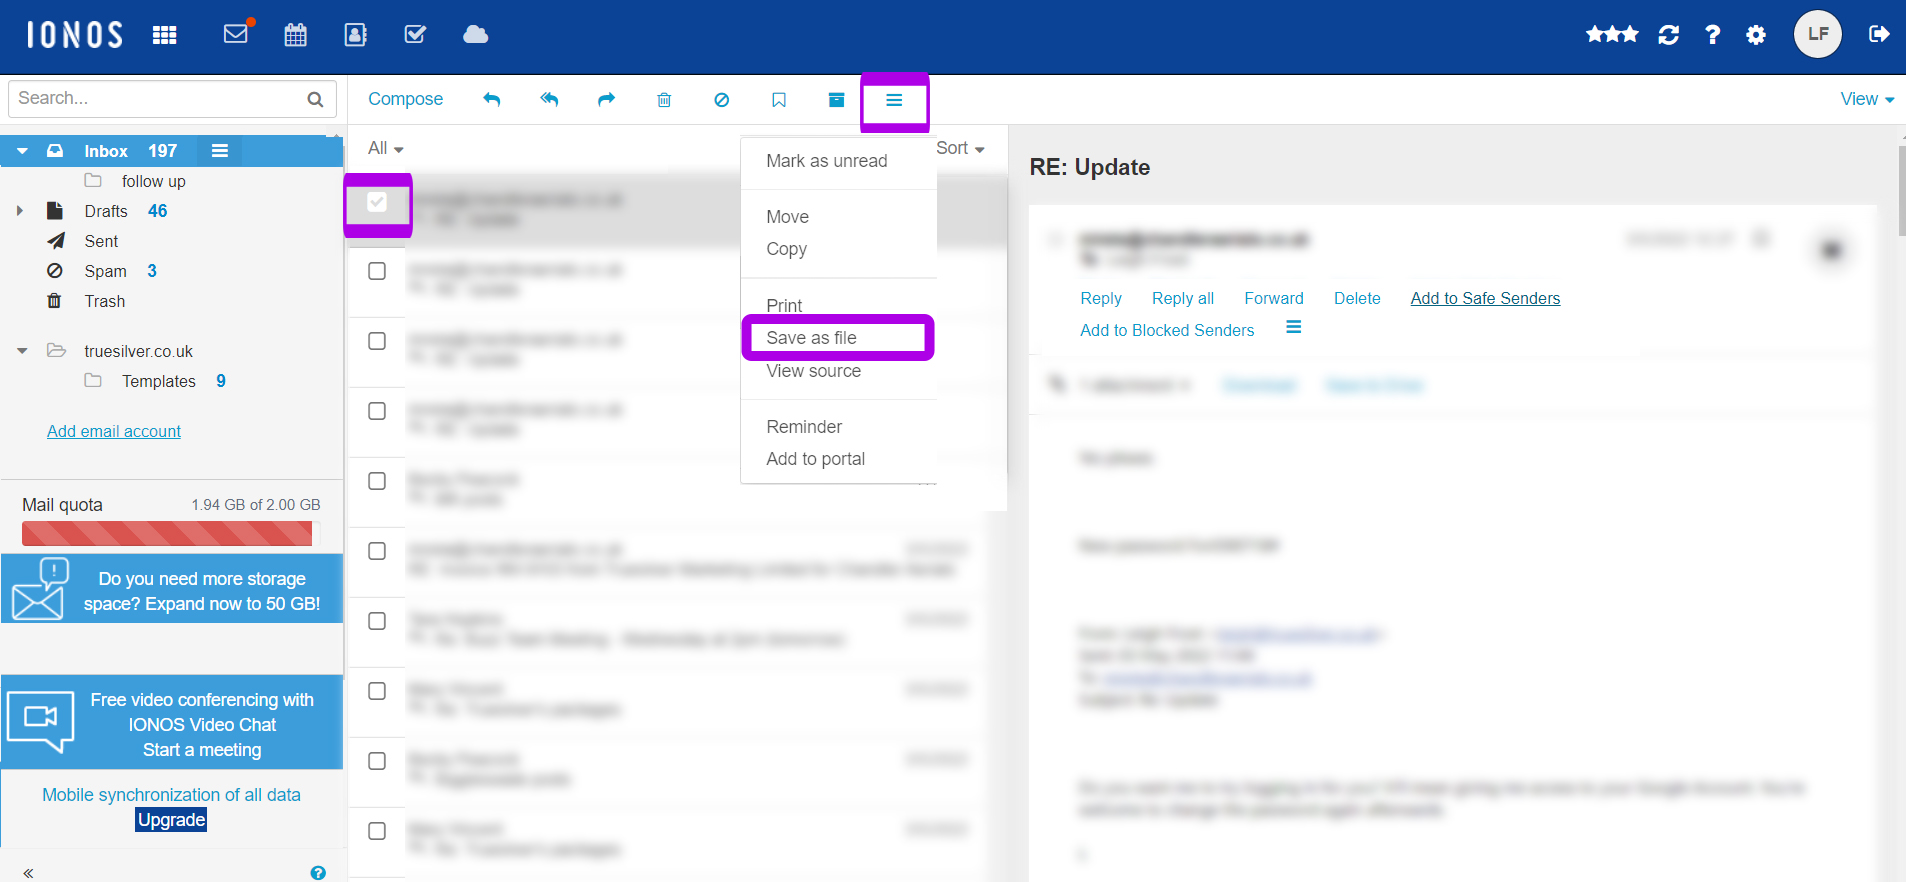
You can also save lots of files at once by selecting the relevant tick boxes on the left hand side of the email list, then again clicking the burger icon and Save as file. See below.
Step 4. Move the emails to trash
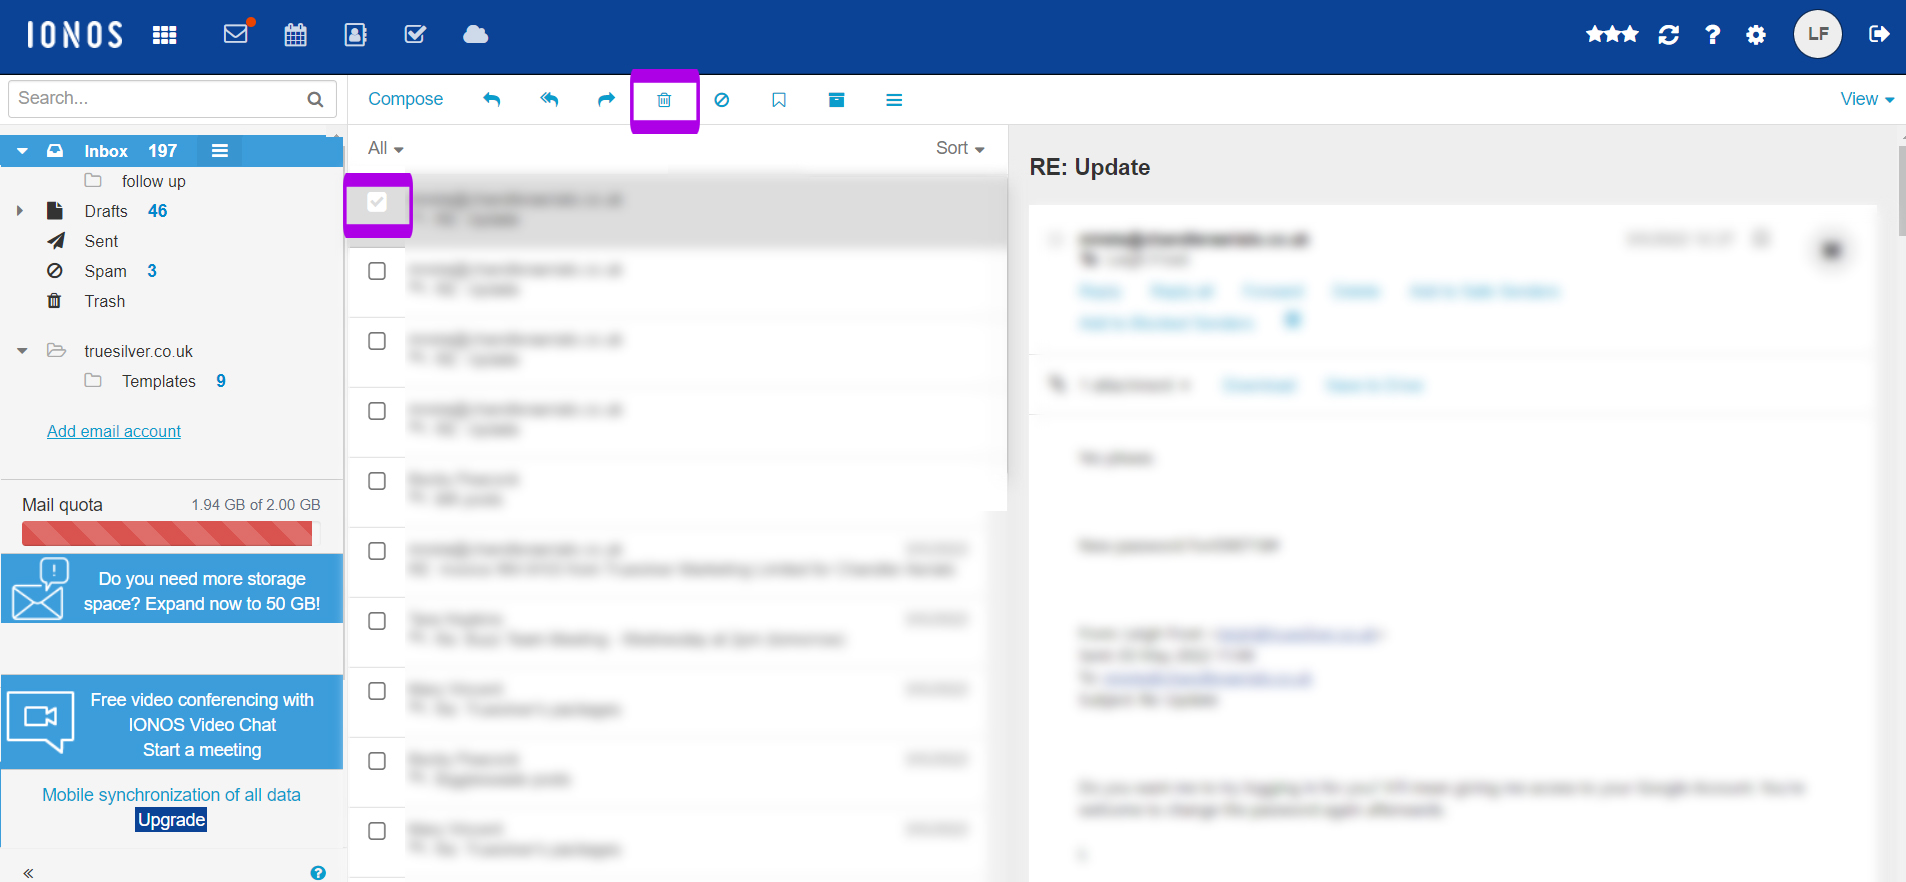
Now you’ve backed up/saved the emails you want, you can delete your largest or oldest files by selecting them using the tick boxes on the left hand side and then clicking the Bin icon in the top of the screen.
Step 5. IMPORTANT – now empty your trash
Clicking the bin merely moves the files to your Trash folder. Now you need to clear that folder to permanently free up the space.
Click on the Trash folder in the top left under the relevant inbox. Then click the burger icon next to it and then click empty trash.
You’ll be asked to confirm that you want to remove all these messages. Make sure that you have correctly backed up any important messages and you can find them again in your hard drive. Then click Empty Folder.
Step 6. Now save and delete files from your Sent box.
Click the Sent folder on the top left hand side and repeat the above steps to save and delete any old or large files from your sent folder. This is often where lots of emails get forgotten, so it’s an important final part of the process.
That’s it! You’re done.
If you run the sort of business that receives a significant number of large attachments regularly, then 2GB might not be enough space for you. If you’re a Truesilver client, contact us to upgrade to 10GB or 50GB of space.
Thanks and happy emailing.
